Thursday, December 08, 2005
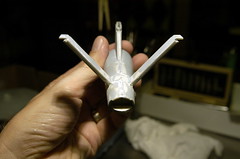
Area to watch out for (after)
And it did exactly what I thought it would. Bad joins and a putty that soaks up paint. Going to try scribing a bit of it out and refilling with Poly putty.
BTW, the use of progressively finer grain sand paper is a *must*. I start out with the Testors sandpaper pack, which goes from 150 gr to 600 gr, then start using a polishing pack from Model Makers. It starts at 3200 gr and progresses to 12000 gr. By then, the paper feels more like suede than sandpaper. Don't skip a grain level! It will show badly when painted. Progressing on up and using the polishing compound will create a surface that is mirror smooth.
BTW, the use of progressively finer grain sand paper is a *must*. I start out with the Testors sandpaper pack, which goes from 150 gr to 600 gr, then start using a polishing pack from Model Makers. It starts at 3200 gr and progresses to 12000 gr. By then, the paper feels more like suede than sandpaper. Don't skip a grain level! It will show badly when painted. Progressing on up and using the polishing compound will create a surface that is mirror smooth.
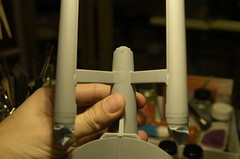
Area to watch out for (before)
This is the area between the nacelle pylons and on the secondary hull. While a superior fit as compared to the original AMT model (Pylons and nacelles secured by pins!) and better than a subsequent version (Slots for the plyons and nacelles, which were single pieces), it does create a very bad join area that is a bitch to fill and sand.
I switched to the Tamiya Poly putty during this build, but I decided to leave this one alone as I had done a lot of work to it and fixing anything would be relatively easy.
I switched to the Tamiya Poly putty during this build, but I decided to leave this one alone as I had done a lot of work to it and fixing anything would be relatively easy.
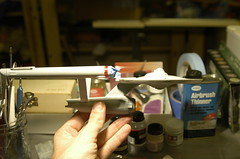
Assembled and second coat.
Just before painting on the second coat. The nacelle domes are clear with part of the nacelle ends also clear. They were painted stoplight red metallic, per instructions for the Pilot verison. The interior dome was painted chrome silver, to help give a backing to the clear outer dome. I would have rather painted the inside of the interior dome chrome, but I'd already sealed and puttyed the nacelles.
More here.
More here.
![]()